Ledge Grabbing
A basic ledge detection implementation.
This particular implementation consists of three parts:
- A horizontal check, ensuring there is space above the ledge
- A vertical check ensuring the top of the ledge is a horizontal surface
- Retrieving a point and normal on the edge for the character to use
First step is the horizontal ray check. This serves a couple of different functions: it is one half of our ledge detection, but also ensures the character has enough space to jump onto the ledge, and works an early check to eliminate invalid positions, such as the character trying to push themselves part way through a wall.
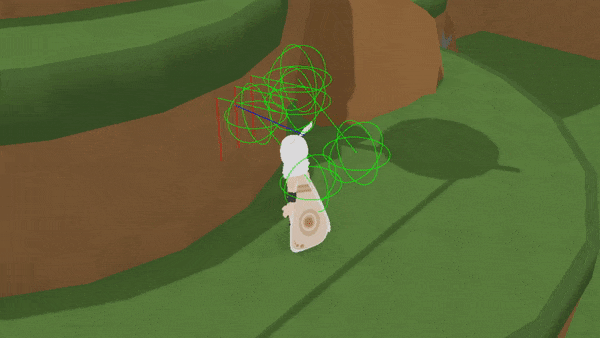
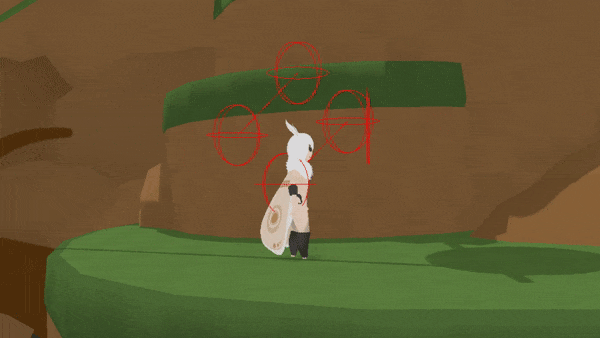
We do this with three raycasts, plus a sphere overlap check. The sphere check is done both to check for space above the character to, and to be sure the rays don’t start inside of a collider, which would cause the raycasts to fail.
Code point - Horizontal checks
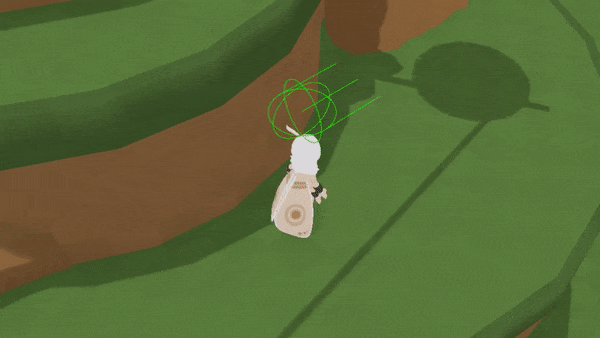
All the gifs are running the full ledge detection code, only with different segments visualized
Now we know there is empty space in front of the upper part of the character. Next, we cast more rays down from the ends of our previous raycasts. This doesn’t need to be exactly on the ends, but those are valid points you can use.
We know implicitly that there is empty space below our first raycasts because of character capsule extending down a ways, and if our new rays hit, we know there’s something in front of the character. So, if there’s empty space in front of the character’s head, but something solid in front of the character’s midsection, we are getting more confident what we are seeing is a ledge. Lastly, we check the angle of the ledge top surface. If it is too steep, we assume it is not actually a ledge the character can climb up on, and we discard the result.
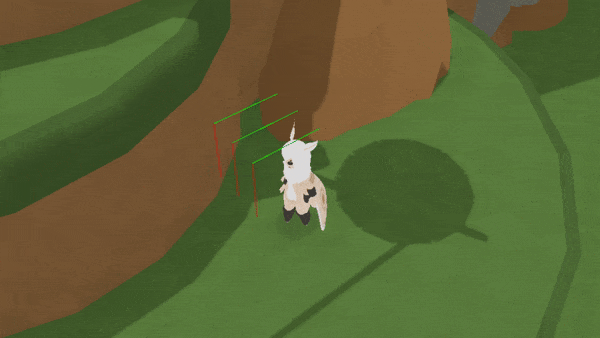
Now we know there is a ledge in front of us, but we don’t know where exactly it is. To get the final ledge point, we cast a tilted capsule at an angle down toward the edge. This part can be rather finnicky, but with some tweaking of the dimensions and angle, you can can find a good balance between detection rate and false positives. So long as the checks in the earlier steps pass, it is pretty reliable. You can do further validation of the edge point by checking the normal of our new point (the angled cyan line below) which we expect to be around 45 to 90 degrees from straight up. If everything succeeds, we will be left with a hit point and a hit normal, which we then use to position and orient the character to the ledge.
That’s all there is to it!